
Why Small Bathrooms Frustrate — and How to Fix That
A cramped bathroom isn't just an aesthetic problem — it affects how smoothly your daily routine runs. Limited counter space, poor lighting, and awkward storage create real friction every morning. The good news: most small bathrooms have untapped potential that doesn't require a gut renovation or a contractor's schedule.
The upgrades below focus on what actually moves the needle in a tight space: better use of vertical room, smarter fixtures, and visual tricks that make square footage feel less punishing. For readers working through multiple rooms at once, the phased spending approach covered in our furniture planning guide applies equally well here.
Go Vertical with Open Shelving
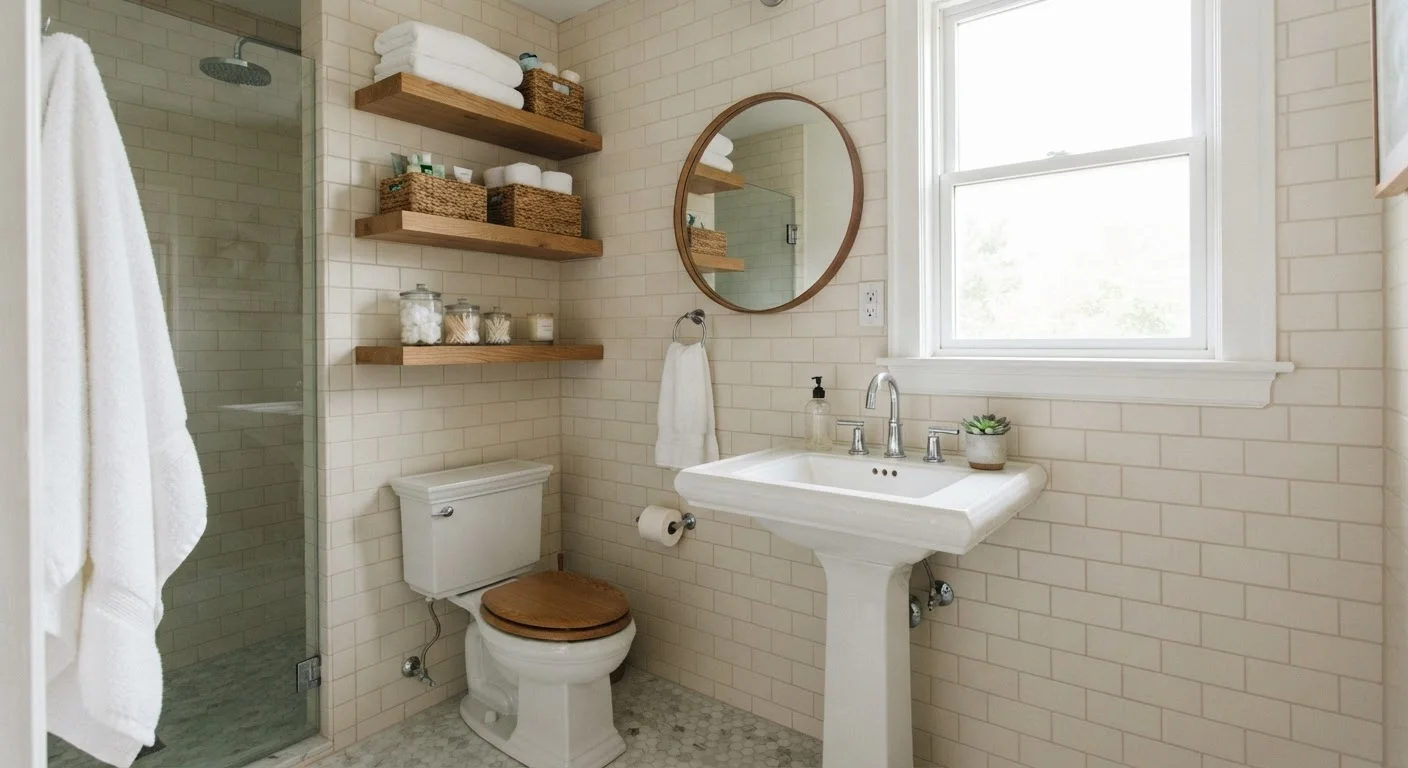
Floor space is fixed, but wall space usually isn't fully used. Installing open shelves above the toilet or alongside the vanity adds meaningful storage without eating into the room's footprint. Floating shelves in particular keep the floor visually clear, which makes the space read as larger.
Look for shelves rated for humid environments — solid wood with a sealed finish or powder-coated metal hold up better than bare particleboard. Keep displayed items to a minimum: a few neatly arranged necessities look intentional; cluttered shelves just move the mess upward.
Wall shelves above the toilet add real storage without shrinking your floor space.
Replace an Oversized Vanity with a Smaller or Wall-Mount Sink
A bulky vanity cabinet can consume a third of a small bathroom's floor area. Swapping it for a pedestal sink or a wall-mounted basin visually opens the room and makes cleaning underneath easier. The trade-off is counter and cabinet storage, so this swap works best when paired with added shelving or an over-door organizer.
Wall-mount sinks require plumbing relocation in some cases — have a licensed plumber assess the work before committing. A drop-in pedestal replacement is usually simpler and may not require professional help beyond shutting off the water supply.
Removing a bulky vanity can reclaim several square feet of visual and physical floor space.
Layer Your Lighting Instead of Relying on One Fixture
A single overhead light casts shadows that make small bathrooms feel cave-like. Adding a sconce or two at mirror height — roughly eye level — fills in shadow and creates a more even, functional light. This matters practically for tasks like applying makeup or shaving, and it changes the perceived size of the room.
LED strip lighting behind a floating mirror or under a floating vanity is a lower-cost option that adds ambient depth. Stick with bulbs in the 2700K–3000K color temperature range for warm, flattering light without a clinical feel.
Eye-level lighting at the mirror eliminates unflattering shadows and makes the room feel larger.
Use a Larger Mirror to Expand the Visual Field
A mirror that extends several inches beyond the vanity on each side — or spans wall to wall — reflects more light and creates the impression of more space. This is one of the highest-impact, lowest-effort upgrades in a small bathroom. You're not changing the room's footprint; you're changing how your eye perceives it.
Frameless mirrors or mirrors with thin metal frames tend to feel less heavy in a tight space. If you're mounting a large mirror, verify you're anchoring into wall studs or using drywall anchors rated for the weight.
An oversized mirror does more for perceived space than almost any other single upgrade.
Reconsider the Shower Curtain vs. Glass Door Decision
A shower curtain, when closed, creates a visual barrier that cuts the room in half. A clear glass panel or frameless glass door keeps sightlines open and makes even a tiny shower feel connected to the rest of the room. Semi-frameless options are typically less expensive than fully frameless and still deliver most of the visual benefit.
That said, glass enclosures do require more regular cleaning to prevent water spots and soap buildup — factor that into your decision. If a curtain is staying, choosing a solid light color or a clear liner with minimal pattern keeps the space from feeling boxed in.
A clear glass shower door removes the visual wall that a curtain creates in a small space.
Maximize the Back of the Door
The back of the bathroom door is almost always wasted space. Over-door organizers with hooks or pockets can hold towels, hair tools, cleaning supplies, or toiletries without requiring any drilling or wall damage. For renters especially, this is one of the most accessible storage upgrades available.
Keep weight limits in mind — most standard interior doors are hollow-core and can handle light organizers but not heavy metal shelving units. The principle of keeping only what you actually use applies here: an organized door works best when you're not cramming it with items you rarely need.
The back of the door is free real estate — use it before buying more furniture.
Choose Light Colors for Walls and Grout
Dark walls absorb light and make a small room feel smaller. Light neutrals — soft whites, warm grays, pale greiges — reflect available light and help the room read as more open. This doesn't mean the space has to feel sterile; texture through tile, subtle pattern, or a single darker accent wall can add character without closing things in.
Grout color is often overlooked. Dark or stained grout between light tiles creates a grid effect that visually fragments the surface and makes the room feel busier. If you're retiling, lighter grout reads cleaner and less choppy. For guidance on what tiling tasks are reasonable for a DIYer versus when to call a professional, see our look at DIY tile work and its realistic limits.
Light paint and grout color costs little but visually expands a tight bathroom more than many expensive upgrades.
Putting It All Together Without Overspending
You don't need to tackle everything at once. Prioritize one or two changes that address your biggest daily frustrations — usually storage or lighting — and build from there. Many of these upgrades cost under $100 and can be done on a weekend. If you're also improving other areas of your home at the same time, planning your purchases carefully before you start buying helps avoid wasted spending across rooms.
One honest caveat: any work touching plumbing supply lines, electrical circuits, or structural walls typically requires a licensed professional and, in most jurisdictions, a permit. Always verify local code requirements before starting work that goes beyond surface-level changes.
Start with Storage, Then Move to Aesthetics
If your bathroom feels chaotic, no amount of new paint or lighting will fix the underlying problem. Get storage working first — shelving, door organizers, drawer dividers — so the space is functional before you spend on visual upgrades. Once clutter is contained, you'll also get a clearer picture of what aesthetic changes will actually make a difference.